
OffSecOps Basic Setup
November 2020
It’s been over 8 months since my last post. It has been a very long year filled with personal struggles compounded by the challenges that 2020 has brought. I hope that I will be able to post new content a bit more frequently. We’ll see how that goes. If you’re having a hard time, hang in there, things will get better.
Introduction
Recently at SpecterOps’ SO-CON 2020, Will Schroeder (@harmj0y) gave a talk titled: OffSecOps. Almost immediately after I finished watching the talk I started to research what it would take to setup my own Jenkins Pipeline. This blog post is the result of me documenting the work I have done to work on setup a PoC pipeline that I can later implement in production to aid in my day job. I decided to post my notes in case they can help others. The example pipeline that Will shared is located at the following URL and has served a template for the pipeline I am attempting to setup:
So far, I have completed a very basic pipeline that is capable of cloning a project from a GitLab repository, builds it, and upload’s the compiled EXE to an Artifactory repository. I have not worked on any obfuscation, IOC generation, or Unit tests. I will continue to pursue these capabilities and may blog about them in the future. In the meantime, I hope that this helps someone start their journey to build their own OffSecOps pipeline.
Install Notes
Sections
- Overview
- Resources
- Windows System Stup
- Conclusion
Overview
So far I have used two systems, one running Windows and another running GitLab. Based on the example Jenkins Pipeline that Will shared, the build system appears to be running Windows. In his talk, he mentioned maintaining an internal SCM system that houses the source code for projects that his team uses. The example he shared uses one of their own repositories, Seatbelt, which is hosted on GitHub. You can skip setting up your own GitLab instance if you like. I will not be covering its installation but, if you’re interested the instructions can be found here:
Resources
- Windows 10 Pro (Minimum version that supports RDP) to install:
- Jenkins
- Artifactory
- Visual Studio Community 2017 (for older builds)
- Visual Studio Community 2019
- Git
- Ubuntu 20.04.1 to install:
- GitLab
Windows System Setup
Installing Visual Studio Community
Install the versions of Microsoft’s Visual Studio Community that you will need to compile your target projects. I chose to install 2017 and 2019 to provide the ability to compile for older systems if necessary. This is a fairly common task and I will not go into detail. You can obtain Visual Studio from the following URL:
Installing Java
- Download the latest version of JDK 11 from:
- Extract the zip file to C:\Program Files\OpenJDK\jdk-11\
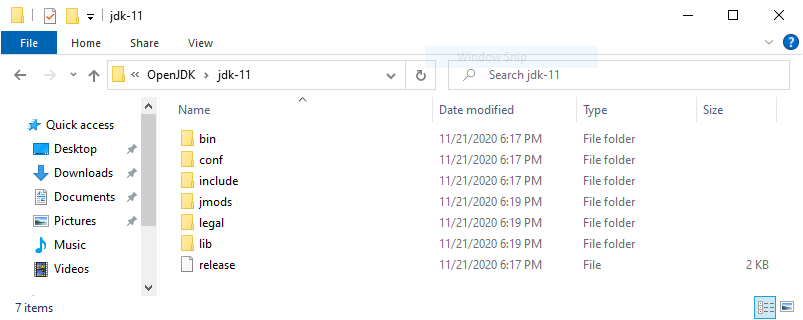
Figure 1: Extract OpenJDK
- Add the path C:\Program Files\OpenJDK\jdk-11\bin to the System Path.
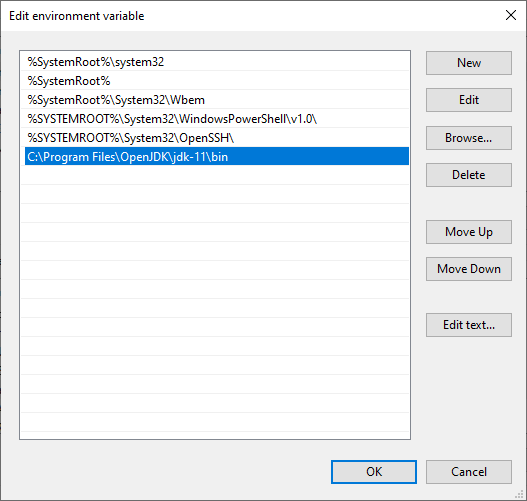
Figure 2: Add OpenJDK to the System PATH variable
- Add a new System Environment Variable named JAVA_HOME and a value that matches the path of your JDK.
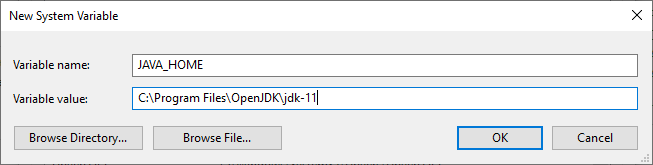
Figure 3: Add a JAVA_HOME System Environment Variable
Installing Artifactory
-
Download the JFrog Artifactory OSS version from the download link.
-
Extract the ZIP file to the C:\ folder.
| NOTE: Do not try to install Artifactory in a directory with spaces. The scripts cannot handle spaces and your installation will not work. |
- Add a new System Environment Variable called ARTIFACTORY_HOME and the path to where you extracted Artifactory to.
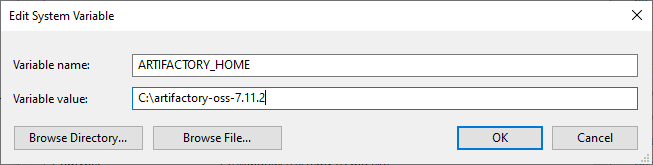
Figure 4: Add a ARTIFACTORY_HOME System Environment Variable
-
Open an Administrative Command prompt and run the InstallService.exe file in the app\bin folder.
-
Stop the Artifactory service.
-
Adjust the permissions on the C:\artifactory-oss-7.11.2 folders in the following ways:
- Break inheritance (Copy the permissions)
- Remove the Write permission from these users:
- Users
- Authenticated Users
- Add the NT SERVICE\artifactory user and grant them Full Access
-
Modify the Artifactory service to run as the NT SERVICE\artifactory user. Change the Service Account to a Virtual Service Account Windows 10 supports Virtual Accounts for services. Instead of leaving the service running as NT AUTHORITY\SYSTEM, we can change the service to run with a Virtual Account instead. More details about Virtual Service Accounts can be found here:
-
Open the Services dialogue and open the Properties for the Artifactory service.
-
Select the Log On tab.
-
Click This account and then type the following into the box.
- NT SERVICES\artifactory
-
Delete the values from the Password and Confirm Password boxes.
-
Click OK.
-
Click OK.
-
Restart the Artifactory service.
-
-
Start the Artifactory service.
-
Access the Artifactory logon page:
- http://localhost:8082/ui/login/
-
Login with the default username and password.
-
Click Get Started.
Figure 5: Click Get Started
- Change the admin password.
Figure 6: Change the admin password
- Set the base URL.
Figure 7: Set the base URL
-
Configure a proxy if you have one.
-
Click Finish.
Artifactory Configuration & Repository Creation
-
Log into Artifactory.
-
Click on Repositories.
-
Click Add Repositories then Local Repository.
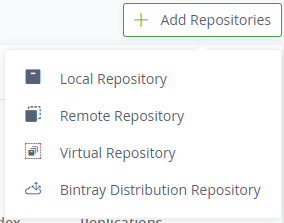
Figure 8: Create a Local Repository
- Select Generic.
Figure 9: Select Generic
- Type a name for your repository into the Repository Key field that ends in -local.
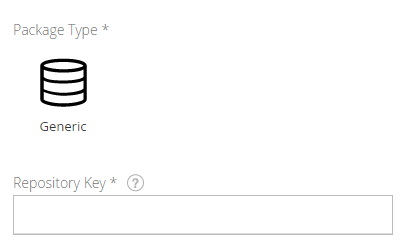
Figure 10: Enter a Repository Key
- Click Save & Finish.
Installing Git
-
Download the Git package from:
-
Run the Git installer and complete the installation.
Installing Jenkins
-
Download Jenkins LTS from:
-
Open the installer MSI, then click Next.
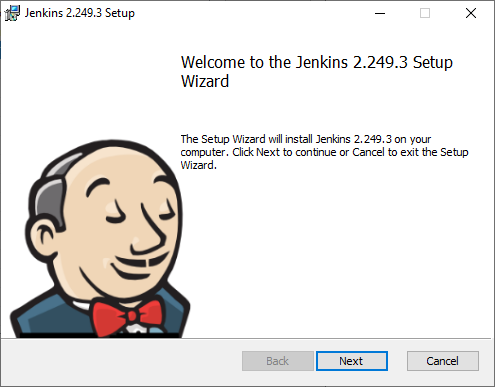
Figure 11: Run the Jenkins MSI Installer
- Accept the default path and click Next.
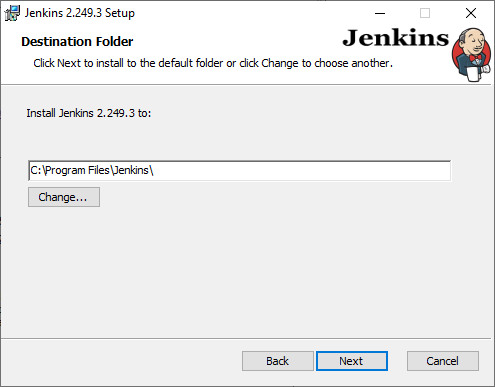
Figure 12: Accept the default path
4.Select Run service as LocalSystem (not recommended) then click Next.
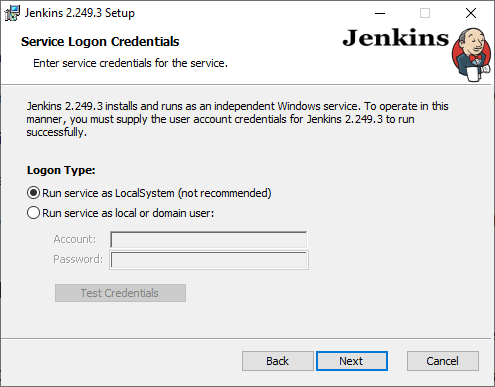
Figure 13: Select the LocalSystem installation option
- Click Test Port then click Next.
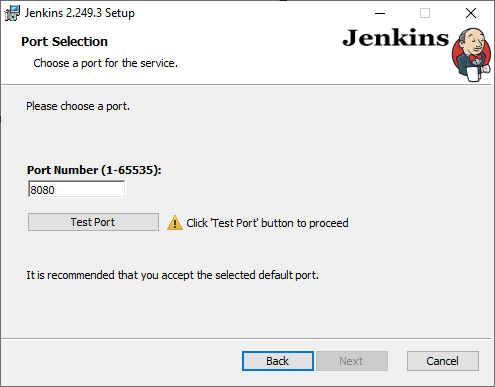
Figure 14: Test the port
- Browse to the folder that OpenJDK is installed in then click Next.
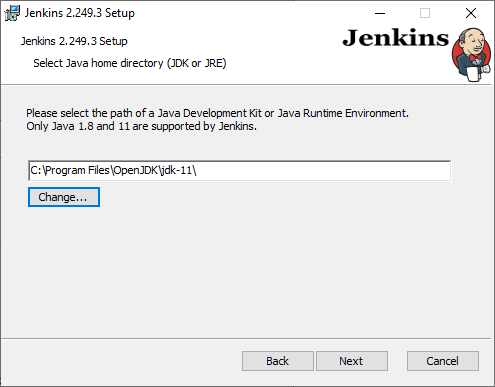
Figure 15: Specify the path to your OpenJDK installation
- Click Next.
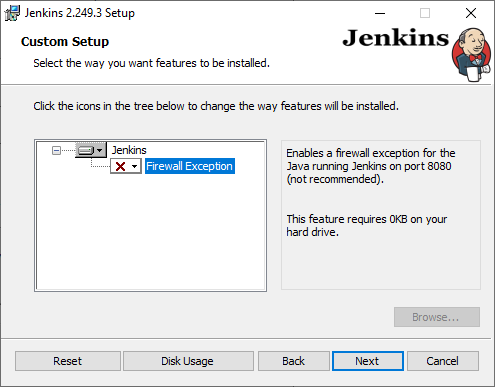
Figure 16: Click Next
- Click Install.
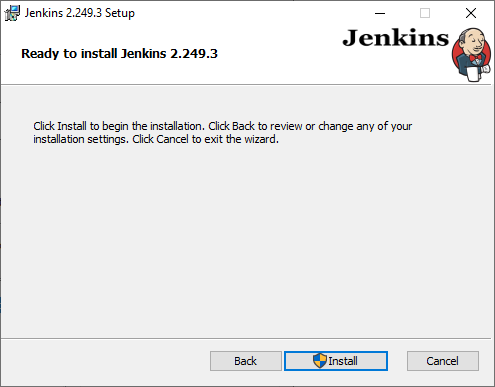
Figure 17: Click Install
- Click Finish.
Figure 18: Click Finish
- Ignore the Getting Started window for now. Once we setup a Virtual Service account, you will would be prompted to setup Jenkins a second time.
Change the Folder Permissions
-
Open the File Explorer and navigate to the *C:\Program Files* folder.
-
Open the properties for the Jenkins folder.
-
Click the Security tab.
-
Click the Advanced button.
-
Click the Continue button.
-
Click the Add button.
-
Click Select principle name.
-
Type NT SERVICE\jenkins into the Enter the object name to select box.
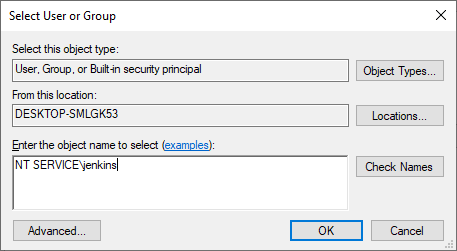
Figure 19: Enter NT Service\jenkins
-
Click OK.
-
Select Full Control.
-
Click OK.
-
Click OK.
Change to A Virtual Account
- Open the Services dialogue and open the Properties for the Jenkins service.
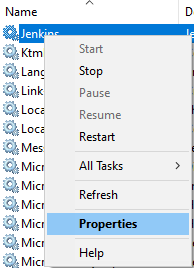
Figure 20: Open the Jenkins service properties
-
Select the Log On tab.
-
Click This account and then type the following into the box:
- NT SERVICE\jenkins
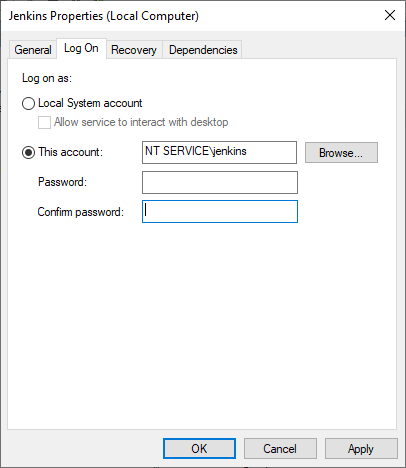
Figure 21: Enter the Virtual Account name
-
Delete the Password and Confirm Password values.
-
Click OK.
-
Click OK.
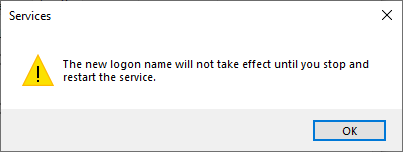
Figure 22: Click OK to acknowledge the warning
- Restart the Jenkins service.
Finish the Jenkins Configuration
-
Open a web browser and open the following URL:
- http://localhost:8080/
-
Locate the password in the referenced file and type it into the dialogue box, then click Continue.
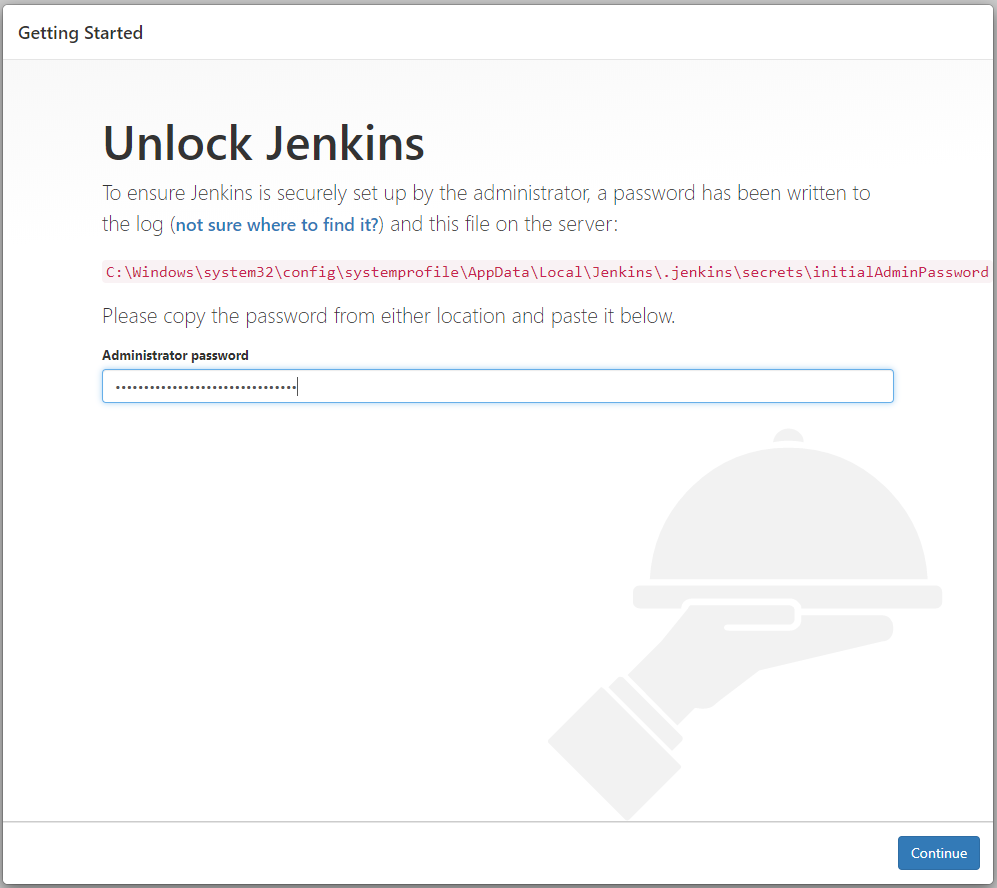
Figure 23: Enter the unlock password stored in the referenced file
- Search for and select the MSBuild plugin.
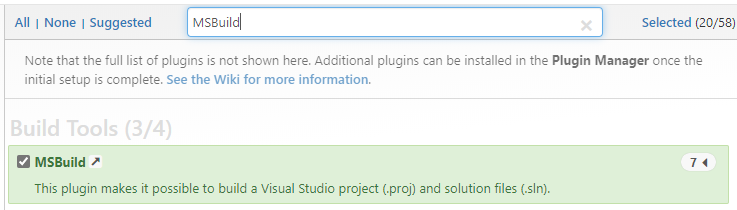
Figure 24: Select the MSBuild plugin
-
Click Install.
-
Enter the information for your first admin account and click Save and Continue.
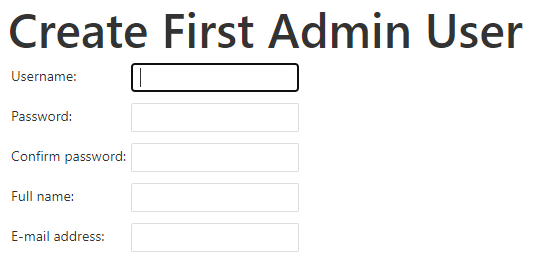
Figure 25: Enter your admin account information
-
Click Save and Finish
-
Click Start using Jenkins.
Configure the MSBuild Plugin
-
Log into Jenkins.
-
Click Manage Jenkins.
-
Click Global Tools Configuration.
-
Scroll down to the MSBuild section and click Add MSBuild.
-
Fill in the Name, Path to MSBuild, and Default parameters fields.

Figure 34: Enter the MSBuild details
- Click Save.
Install the GitLab Plugin
-
Log into Jenkins.
-
Click Manage Jenkins.
-
Click Manage Plugins.
-
Click the Available tab.
-
Search for GitLab.
-
Place a check next to the GitLab Plugin.
-
Click Install without restart.
-
Let the installation complete and then restart Jenkins.
-
Log back into Jenkins and click Manage Jenkins.
-
Click Configure System.
-
Scroll down to the GitLab section and complete the Connection Name, GitLab host URL, and Credentials fields. I recommend setting up an API key for GitLab but you can use and ID and Password.
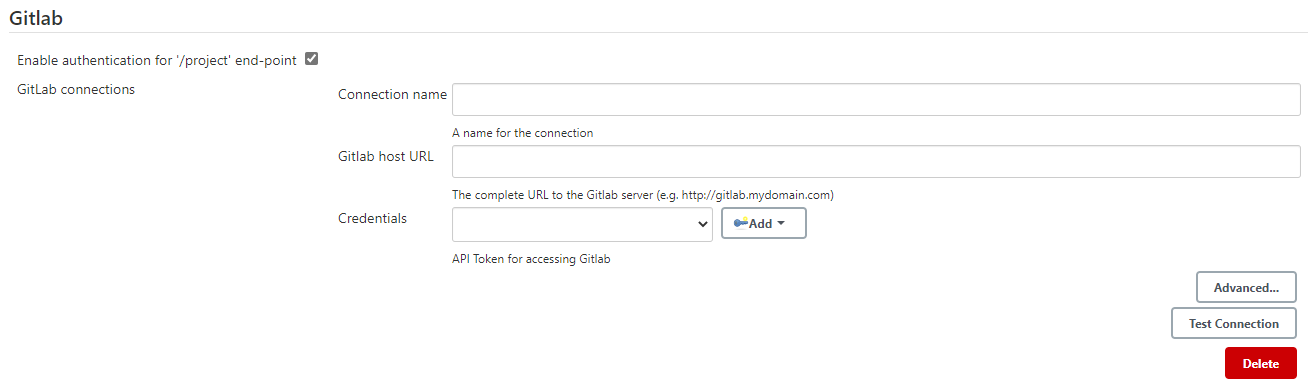
Figure 33: Enter your GitLab server details
- Click Save.
Install the PowerShell Plugin
The PowerShell Plugin will be needed to run the Pester Tests that the example pipeline is using to check the compiled binaries for IOCs.
-
Log into Jenkins.
-
Click Manage Jenkins.
-
Click Manage Plugins.
-
Click the Available tab.
-
Search for PowerShell.
-
Place a check next to the PowerShell Plugin.
-
Click Install without restart.
Install the NUnit Plugin
Pester’s outputs its test results in NUnit format. This plugin will be needed once Pester tests are implemented.
-
Log into Jenkins.
-
Click Manage Jenkins.
-
Click Manage Plugins.
-
Click the Available tab.
-
Search for NUnit.
-
Place a check next to the NUnit.
-
Click Install without restart.
Setup a Defender Exception
I will be compiling binaries that Defender doesn’t like very much. To keep things simple, I have chosen to setup an exception on the Jenkins service account profile’s folder. This should be enough to keep Defender off my back, for now.
Setup an exception for the following folder:
- C:\Windows\ServiceProfiles\jenkins
Basic Pipeline Setup
Now to create a simple Jenkins Pipeline that will clone the source code from our local GitLab server, compile it, and then upload the compiled executable to the Artifactory repository. This is a very basic example that does not include much of the functionality that Will’s example but, it will be possible to add additional stages that will allow us to get close to the same functionality that he demonstrated in his talk.
-
Log into Jenkins.
-
Click New Item.

Figure 26: New Item
- Type a name for your pipeline into the Enter an item name field.
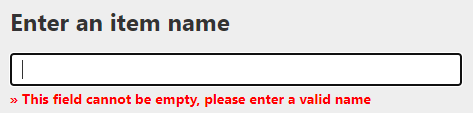
Figure 27: Enter an item name
- Select Pipeline.

Figure 28: Select Pipeline
- Click OK.

Figure 29: Click OK
- Place a check next to GitHub project and fill in the Project url and select the GitLab Connection that was configured during the setup process from the drop down menu.

Figure 30: Configure the GitLab Connection
-
In the Build Triggers section, if you wish to automatically build your project based on a schedule, setup your criteria. For now I am using a manual trigger while I am working on developing a full solution.
-
Move down to the Pipeline section and enter the following skeleton pipeline script:
1
2
3
4
5
6
7
8
9
10
11
12
13
14
15
16
17
18
19
20
pipeline {
    agent { label 'master' }

    environment {
    }
    stages {
        stage('Checkout') {
            steps {
            }
        }
        stage('Build') {
            steps {
            }
        }
        stage('Publish') {
            steps {
            }
        }
    }
}
-
Our first stage, Checkout, is used to retrieve the source code from the repository. To complete this section click on the Pipeline Syntax link bellow the script dialogue. This will open a new tab. We’re going to use the utility to help create an action to download the source code.
-
From the Sample Step drop-down menu, select git: Git. Complete the Repository URL, Branch, and Credentials fields with the URL of your target GitLab repository, the branch name, and credentials that will be used to clone the repository.
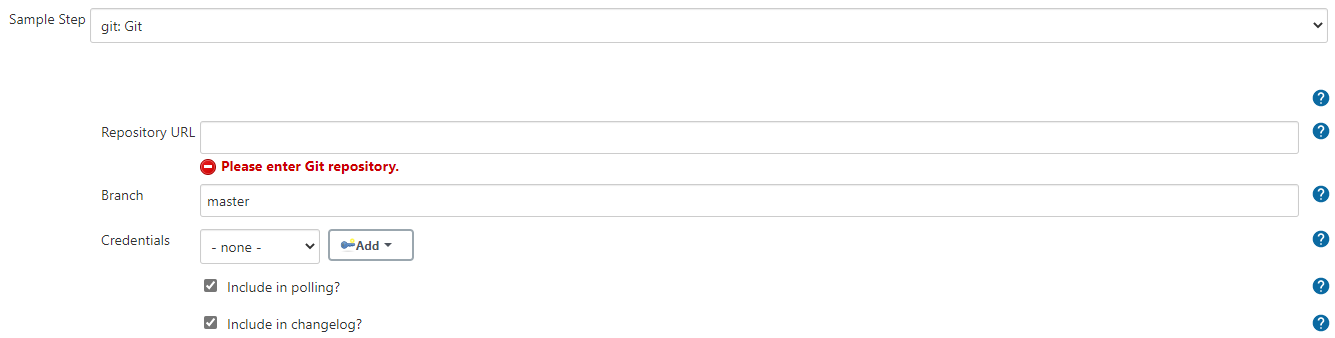
Figure 31: Complete the required fields
- Click the Generate Pipeline Script button.

Figure 32: Click Generate Pipeline Script
-
Copy the resulting script and paste it between the steps brackets of the Checkout section.
-
Next, copy and paste the following into the environment section. Be sure to update the values to match your solution’s options. The CONFIG value should match the build configuration and the PLATFORM value should match the target CPU architecture of the solution.
1
2
CONFIG = 'Release'
PLATFORM = 'Any CPU'
- Copy and paste the following into the steps brackets of the Build section. Be sure to update the Tool-Name to match the name of the MSBuild instance required to compile your solution. The Solution-Name should match the name of the solution file in your project. You can modify this command to suit your needs. This example will work for most projects.
1
bat "\"${tool 'Tool-Name'}\\MSBuild.exe\" /p:Configuration=${env.CONFIG} \"/p:Platform=${env.PLATFORM}\" /maxcpucount:%NUMBER_OF_PROCESSORS% /nodeReuse:false Solution-Name.sln"
- Copy and paste the following script into the steps brackets of the Publish section. Be sure to update the artifactory-repository value to match the name of the Artifactory repository that you setup. Set the Solution-Name to match the name of your solution.
1
2
3
4
5
6
7
8
9
10
11
12
13
14
15
script {
    rtBuildInfo()
    rtUpload (
        serverId: "artifactory-repository",
        spec:
        """{
            "files": [
                {
                    "pattern": "*/bin/*/*.exe",
                    "target": "artifactory-repository/Projects/Solution-Name/"
                }
            ]
        }"""
    )
}
- Copy and paste the following script into the steps brackets of the Publish section. Be sure to update the artifactory-repository value to match the name of the Artifactory repository that you setup. Set the Solution-Name to match the name of your solution.
- The complete script should look something like this example:
1
2
3
4
5
6
7
8
9
10
11
12
13
14
15
16
17
18
19
20
21
22
23
24
25
26
27
28
29
30
31
32
33
34
35
36
37
38
39
40
41
42
43
44
pipeline {
    agent { label 'master' }
    environment {
        CONFIG = 'Release'
        PLATFORM = 'Any CPU'
    }
    stages {
    stage('Checkout') {
            steps {
                checkout([$class: 'GitSCM',
                branches: [[name: '*/master']],
                doGenerateSubmoduleConfigurations: false,
                extensions: [],
                submoduleCfg: [],
                userRemoteConfigs: [[credentialsId: 'gitlab-jenkins',
                url: 'http://gitlab.example.local/jenkins/Seatbelt.git']]])
            }
        }
        stage('Build') {
          steps {
              bat "\"${tool 'MSBuild-VS-2019'}\\MSBuild.exe\" /p:Configuration=${env.CONFIG} \"/p:Platform=${env.PLATFORM}\" /maxcpucount:%NUMBER_OF_PROCESSORS% /nodeReuse:false Seatbelt.sln"
          }
        }
        stage('publish') {
            steps {
                script {
                    rtBuildInfo()
                    rtUpload (
                        serverId: "offsecops-local",
                        spec:
                        """{
                            "files": [
                            {
                                "pattern": "*/bin/*/*.exe",
                                "target": "offsecops-local/Projects/Seatbelt/"
                            }
                            ]
                        }"""
                    )
                }
            }
        }
    }
}
-
Click Save.
-
Click Build Now.
Conclusion
I still have much to do before this pipeline will ever be as complete and automated as the one that Will demonstrated in his talk but, this should serve as a good place to start. I have already begun to look into options to provide obfuscation and IOC extractions. I will share what I come up with as I have time. Until next time…